Showing posts with label Japanese. Show all posts

Wednesday, 6 October 2010

sake plum infused green tea.

Today was an exceptionally beautiful day. The sun decided to pay The City a visit again. It was warm, but the breeze carried that faint bite of the autumn chill.


 Since sunny days are a rarity, I decided to spend the day after lectures outside in the garden beneath the shade of a paper umbrella bequeath to me by my late step-grandfather. He was a charming, sweet man who loved me as if I was one of his own. I'll forever be grateful for that. I'd like to think that my grandmother's finally reunited with him up there in that ethereal paradise. She fought so bravely... but I'm going quite off tangent!

I decided to break out my favorite pair of wooden sandals to wear. They always seem to cheer me up when I slip my feet upon its smooth, cold lacquered body.


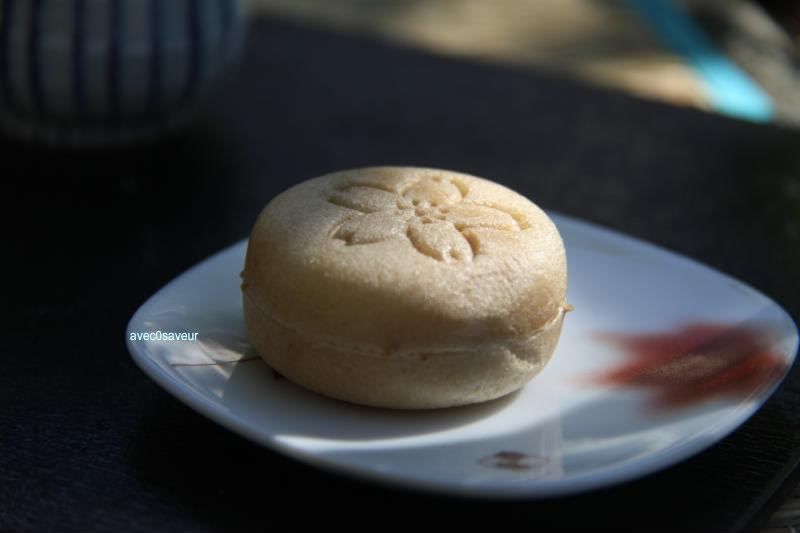
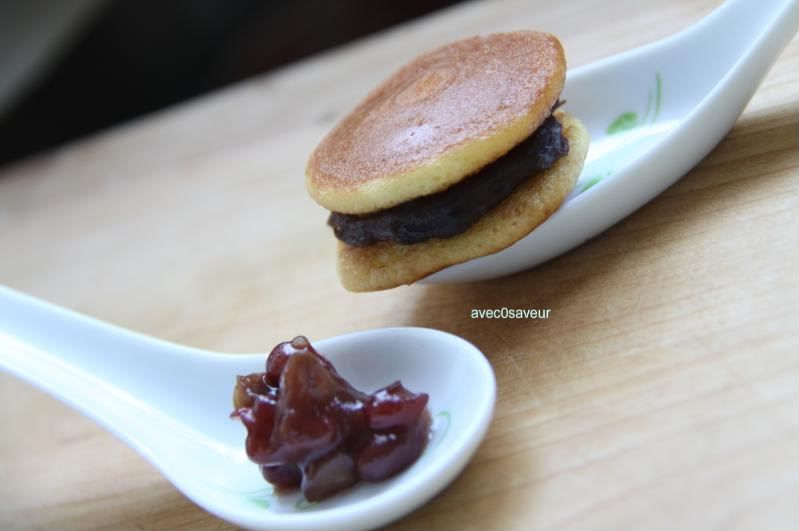
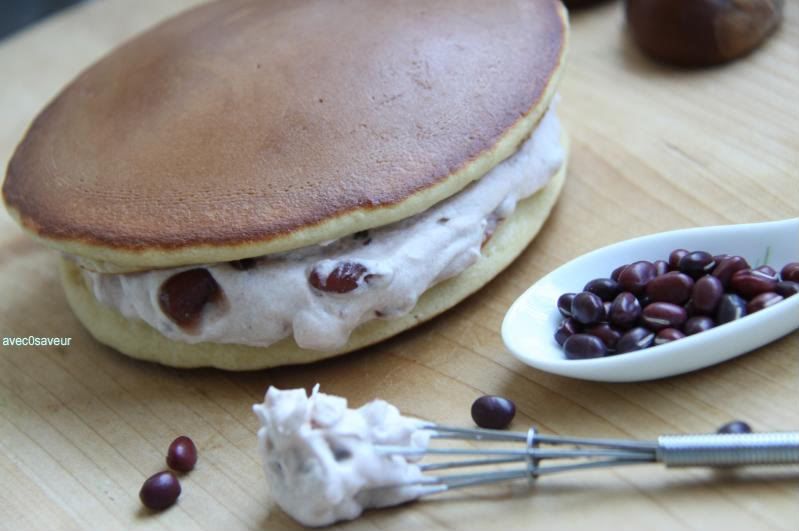
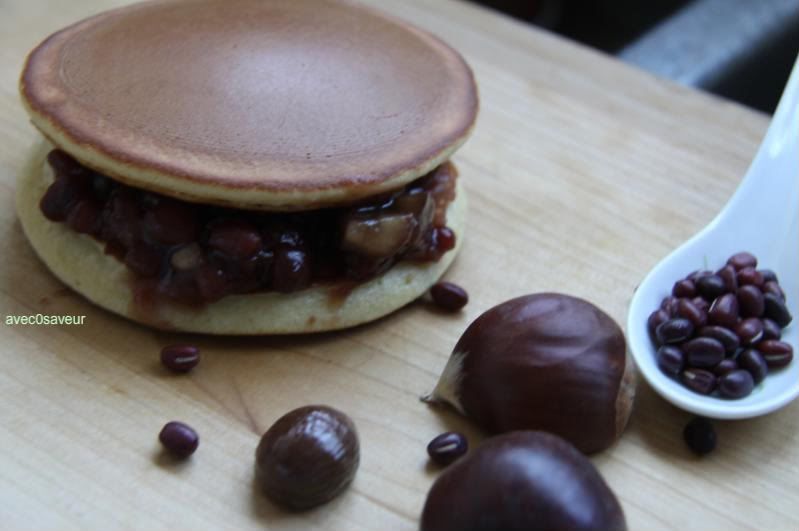
Of course, one doesn't lounge under the sun without proper refreshments! I brought along a few "wagashi"(和菓子)or Japanese sweets for snacking on. With wagashi, there must be a pot of steaming green tea to stand up to the intense sweetness of the red bean paste that often fills them.


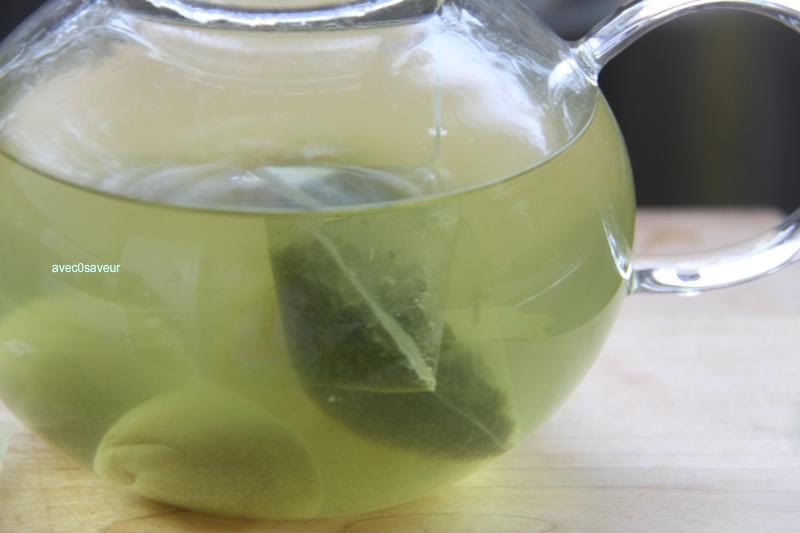
And this is what I'll be introducing to you all, my lovely readers and fellow culinary deviants! Green tea infused to sake plums. The family goes through a lot of plum sake and often time we tend to accumulate a lot of plums which we keep in a jar tucked behind the milk in the fridge. So, I decided to see if it works with green tea and surprisingly it pairs quite well as the tea doesn't carry a strong flavor, allowing the aroma of the plum and sake to come through.


sake plum infused green tea

we'll need:
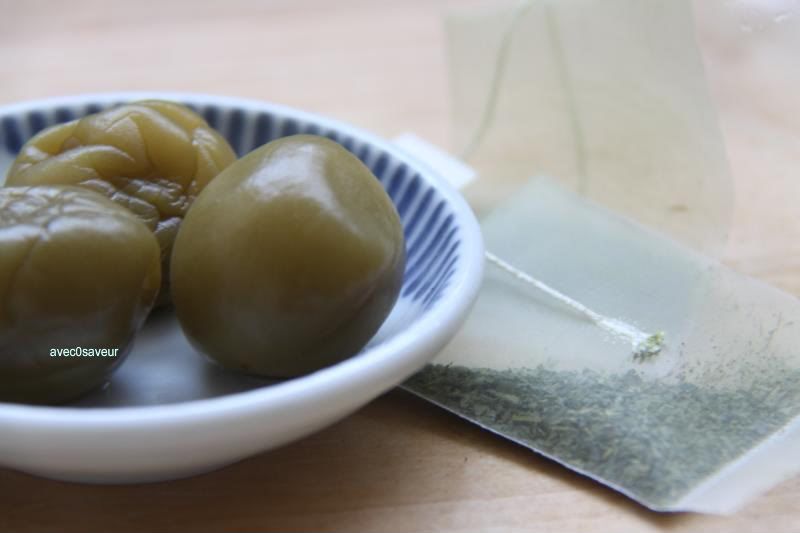
2~3 sake plums (crushed slightly, with the side of a kitchen knife)
2 green tea bags

an assortment of wagashi (Japanese sweets) to serve 

utensils:
tea pot
tea kettle

~Fill a tea kettle with water and bring to a boil. Next, carefully pour the hot water into the tea pot until it's half way full. Let stand for about 10minutes and pour out the water. Place the plums and tea bags into the pot and fill completely with hot water. Let steep for 15minutes.

Find a shady spot and enjoy with wagashi!


Sunday, 18 July 2010

Curry Croquettes (カレークロケット)

Comm is finally over! I can finally direct my attention and effort toward this blog (along with my art site)~ So expect more frequent updates from now.


Anyway, I digress~ onward to the curry croquettes! So, as I've said, if you've a bit of leftover filling, egg wash, and panko from the curry bread recipe, you can totally make use of them in this recipe. =)


Curry Croquettes (カレークロケット)


We'll  need:
4~5 medium-sized russet potatoes (peeled, boiled and cooled)
left-over curry filling from the curry bread (or just halve the recipe)
1.5 cups  vegetable of choice (blanched and diced) or frozen vegetable medley

-egg wash-
1/4 c. milk
2 eggs

left-over panko (or 1.5 cups)

Oil for frying
ketchup, tonkatsu or okonomiyaki sauce for serving (optional)


Utensils:
large mixing bowl
spatula
measuring cups
fork
two shallow dishes
baking sheet lined with parchment
heavy pot
candy thermometer
frying spider
cooling rack or a a few dishes lined with paper towels

~In the mixing bowl, mash the potatoes with the fork until there are no visible lumps of potato. Then add the curry filling into the bowl, mix with spatula until evenly incorporated. Next, add the vegetables and mix well. With wet hands, carefully shape the potato mixture into balls (as large or as small as you like) and place onto the parchment-lined baking sheet. Freeze until firm (about 20-30mins).


~In one of the shallow dishes prepare the egg wash by whisking together the eggs and milk. Place the panko in the other. Remove the potato balls from the freezer and quickly dredge in the wash and then in the panko crumbs, return each prepared croquette back onto the baking sheet. Fill the heavy pot halfway with oil and heat on med-high, until it reaches 350F (about 8-10mins). Fry the croquettes, two or three at a time, until golden (about 10-15mins).  Remove with the spider and place on a cooling rack or paper towel-lined plates to drain.


Serve with tonkatsu or okonomiyaki sauce, or if those aren't available, you can use ketchup or even steak sauce.

Sunday, 4 April 2010

Dorayaki

ふわふわなどら焼きはいかがですか? How about some dorayaki? These are always a joy to make (and munch on). I've tried the store-bought ones and they just don't satisfy. The cakes are always too dry and the filling a tad sweet for my taste. So, I've decided to just make my own, since that way I can alter the dorayaki as I like. Today, I'll show you how to make two types of dorayaki: your basic dorayaki and nama dora.


Eep, no step by step photos again... my apologies.  I will include them in my later recipes.

What we'll need:
-for the cake-
2 eggs
2 tbls caster sugar
2 tbls honey
3/4 cup + 2tbls all-purpose flour
1 tsp baking powder
1/3 cup milk (or water)

oil for cooking the cakes

-for the filling-
a can of red bean paste (called "an" or you can use "anmitsu" which is just whole red beans in syrup-- you can drain and mash them to form a paste)
1 cup unsweetened whipped cream

Utensils:
measuring cups and spoons
two mixing bowls
whisk
trusty spatula
plastic wrap
frying pan or griddle

~ In a bowl, beat the eggs with a whisk, gradually adding the sugar and honey to it.

~ Sift the flour and baking powder into the egg mixture and combine.

~ Slowly stir in the milk (or water) to the egg and flour mixture.

~ Cover the batter with plastic wrap and let rest at room temperature for at least 30 mins.

~ Oil the frying pan (or griddle) and set the heat medium (or medium low). When the pan is hot and ready, pour 1/4 cup of batter for each cake onto the surface. When the tops of the cake batter begins to bubble (about 2~3 mins), flip the cake over and cook for another minute or so. Repeat until you've used up the batter.

~ Once you've a stack of the griddle cakes, pair them up so they match in size. Set them aside.

~ Spoon half the can of red bean paste into a bowl and gently fold the unsweetened whipped cream into it. Sandwich spoonfuls of the cream mixture between the pairs of cakes for nama-dora.


(nama dora)


~With the remaining bean paste, spread them between the cakes that are left, making dorayaki.
(dorayaki with sweet red bean filling and chestnuts)